Navigation Bar Home Furniture Posts DIY POSTS Photography Design

6.29.2011

A Prototype Scarf

A couple weeks ago Sarah and I decided to try to revive our middle school sewing skills. It was a scary prospect but we borrowed a friends sewing machine and dove in head first.

Disclaimer: Fashion majors and people who actually know how to sew, look away. We have no idea what we're doing :)


We decided the easiest thing to try was a scarf. So we got started...

and 45 minutes later we had the machine threaded!

Seriously.

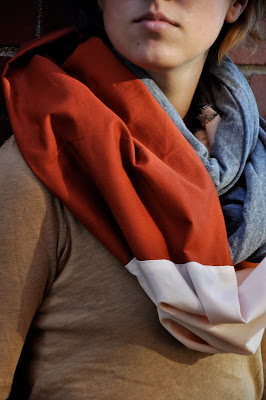
Sarah had a bunch of fabric remnants so we picked a few colors we liked, laid them out and cut them to approximately the same width.

This is me after sewing the first time since middle school!


We sewed all three pieces together to practice our straight lines ahah.


Then we pinned it and essentially turned it into a giant tube. We wanted it to be big and voluminous so it was pretty large.


Then we sewed it together so it was a giant circle. Here's Sarah rockin' the finished product.


We've got many more ideas! And with more practice we're starting to get the hang of the whole sewing thing. Maybe next time we'll actually look up some instructions or something :)

Sincerely,
Ashleigh

6.28.2011

Intern Heroes!

Little Debbie currently has a contest running where interns can win free breakfast items by submitting a picture saying why they deserve Little Debbie breakfast.

If you didn't know, Sarah and I (along with two other awesome people) intern at the same ad agency. Today we decided to have a little fun and submit a picture! Here is our work of art:
From left to right: Katie, Ashleigh, Jake & Sarah

Jake was a good sport and let us photoshop him up as a Little Debbie wannabe. And a few short hours later, we found out that we won!


We can not wait to get that box in the mail!

So go check us out and spread the word if you know any interns!

Sincerely,
Ashleigh

6.26.2011

Call me crazy...again.

I feel like the majority of my posts should start out this way. I posted my first crazy idea here and I'm still working on that one. Meanwhile, I saw on a blog (and I can't remember where!) that someone used contact paper to make chevron stripes on their wall. I thought this was a genius idea because I'm a renter and can't do anything permanent.

Well, if you know me at all, I'm not one to measure and take my time so chevron was not going to work for me. Stripes seemed simpler. I thought I had a one of a kind idea but as soon as I googled "tape on walls" I ran across this post over at High-Heeled Foot in the Door. So I'm not a genius haha but it was nice to find someone who had already done this!

I used three inch electrical tape that I ordered off Amazon. I'm kinda lazy so I skipped the measuring and math and just tried to space my stripes 5 inches apart. They aren't perfect but I'm ok with that. I'm pretty short so reaching the ceiling was a small victory in itself!


I picked up these vintage jello molds from Cindy over at Custom Comforts. I love the way they look with the gold mirror.


So, what do you think? I don't even know if I love it. I'm trying to picture a gallery wall behind the tv eventually. But I'm still not sold. The best part? I can take it down if I don't like it. I promised myself I'd live with it a few days before I take it down.

It is starting to grow on me :)

Sincerely,
Ashleigh

PS: "Like" us on Facebook (on our sidebar) to get sneak peeks of projects like this :)

PPS:
Transformation Thursday

6.25.2011

Gratuitious Cat Photos

Sarah and I have been super productive today. So productive that I haven't the strength the put together a real post. Let's just say we can officially cross something off of Sincerely's 100!

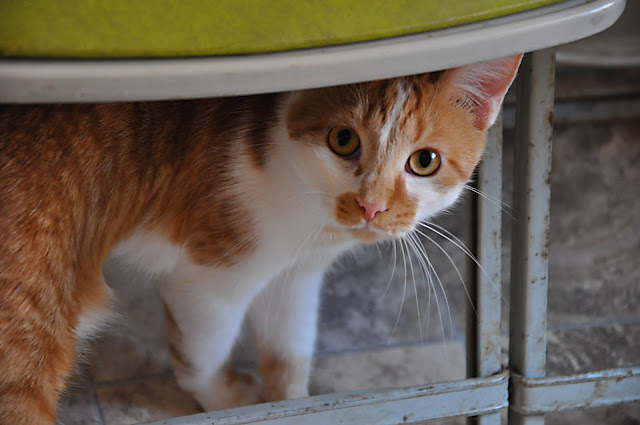
Anyway- everyone knows I'm a little obsessed with my cat. I can't help it! So I figured I could muster up the energy to share a couple pictures of the little guy.

Peeking out from a new addition to the apartment that I'll share soon!

He's a stone cold fox cat.

Isn't he the sweetest!


Thanks for indulging me! Anyone else crazy about their pets? I know I can't be the only one... please tell me I'm not the only one!

Sincerely,
Ashleigh

6.22.2011

Mid Century Dresser Makeover

Hey Everyone!

Regular posting should resume shortly! I'm all moved in, not settled but at least everything is in here. It may be weeks until all my clothes are off the floor but hey, slow and steady, right? Meanwhile, new apartment means a lot of new projects! So I should have some pretty cool stuff to share soon :)
First up- this mid century modern dresser. I picked the handsome man up from Craigslist months ago with my new apartment in mind. I normally don't go for this style, but lately I've been having an affair with mid century design. Did I mention it was only $35, in perfect condition? Yeah. Baller status.


I liked the original color but decided I wanted to go just a little darker. The top was laminate (sad face) but everything else was either solid wood or real wood veneer (read: stainable).


I tested one to see the difference. Then I finally was able to get outside and do the rest of the drawers.


Because the top was laminate, I decided to paint the outside. I was originally going to go with white...but for some reason I can't recall I decided to go with a medium gray.


Yes... I was watching cash cab. I need to go on that show! I was killin' it!


It just wouldn't be a complete post without an appearance by Liam.


This corner of the apartment is looking a little bare at the moment. But after I finish a couple projects I'm working on it should start to come together.


So how do you guys feel about mid century pieces? I'm usually more of a traditional girl but I'm beginning to stray ;)

Sincerely,
Ashleigh


PS:

Transformation ThursdayFurniture Feature Fridays
Chic on a Shoestring DecoratingPhotobucket

Beyond The Picket Fence


6.19.2011

Antique Chairs Pt. 2

Ok, so it's been an incredibly long time since I first introduced you to these chairs here. Well I finally got around to finishing them up (which I could not have done without the help of this wonderful, insanely talented woman), but I took so many pictures that I'm splitting it up into two posts. So here is part 2 of my pair of antique chair makeover:

Disclaimer: Lots of Liam pictures in this post. I can't help it! He loves being in the spot light!


With the help of my wonderful boyfriend (and kitty), we began tearing these guys apart.


There was a lot of this:


Which resulted in this mess:


After the crumbly-foam-pocolypse we were left with this:


We popped the backs out and saved them for future reference.


Liam found a place to lay and watch. It's not like he was in the way or anything!


I sanded off the peeling finish so I could paint.


Then I prepared my first coat. I knew I wanted to distress the frames so I mixed a gray color to be the base coat.


I distressed the base coat a little then painted over it with a soft black from Martha Stewart. After distressing I gave them each a coat of wax. You can sort of see the difference: the one in the back was waxed and the front wasn't.


Here are some close-ups of the final finish.


Love love love!

Stay tuned for the finished chairs! Hopefully I can get to the post this week! I'm still settling into my new apartment and need to get some good pictures! Then I'll be able to cross a few things off of Sincerely's 100 List!

Have a wonderful weekend, everyone!

Sincerely,
Ashleigh

PS:
PhotobucketHOGDomestically Speaking


Related Posts Plugin for WordPress, Blogger...