Navigation Bar Home Furniture Posts DIY POSTS Photography Design
Showing posts with label interior design. Show all posts

6.26.2011

Call me crazy...again.

I feel like the majority of my posts should start out this way. I posted my first crazy idea here and I'm still working on that one. Meanwhile, I saw on a blog (and I can't remember where!) that someone used contact paper to make chevron stripes on their wall. I thought this was a genius idea because I'm a renter and can't do anything permanent.

Well, if you know me at all, I'm not one to measure and take my time so chevron was not going to work for me. Stripes seemed simpler. I thought I had a one of a kind idea but as soon as I googled "tape on walls" I ran across this post over at High-Heeled Foot in the Door. So I'm not a genius haha but it was nice to find someone who had already done this!

I used three inch electrical tape that I ordered off Amazon. I'm kinda lazy so I skipped the measuring and math and just tried to space my stripes 5 inches apart. They aren't perfect but I'm ok with that. I'm pretty short so reaching the ceiling was a small victory in itself!


I picked up these vintage jello molds from Cindy over at Custom Comforts. I love the way they look with the gold mirror.


So, what do you think? I don't even know if I love it. I'm trying to picture a gallery wall behind the tv eventually. But I'm still not sold. The best part? I can take it down if I don't like it. I promised myself I'd live with it a few days before I take it down.

It is starting to grow on me :)

Sincerely,
Ashleigh

PS: "Like" us on Facebook (on our sidebar) to get sneak peeks of projects like this :)

PPS:
Transformation Thursday

5.29.2011

A DIY Industrial Lamp... For Free!

I'm super excited about this project! It was a pretty spur of the moment thing, but I'm so glad I decided to give it  shot.

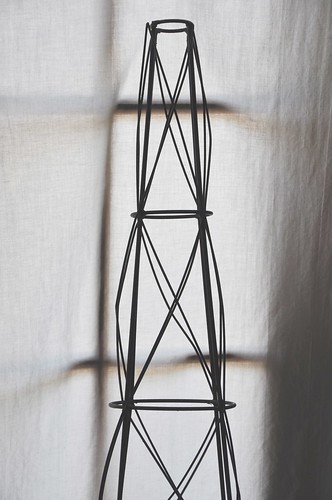
It all starts with this rusty tomato cage from our yard. My mom isn't keeping a big garden this year and when I saw this in the yard I asked if I could have it. I wasn't sure what I'd do with it, but I liked it and thought I could make something out of it.

I've been looking around for a lamp for my new place and haven't found anything I love. It doesn't help that even the cheapest lamps are $40! So I figured I could somehow turn this into an industrial-esque lamp.

DSC_4852 

I remembered I had been hoarding an old brass lamp so I brought that up from the basement. At first I thought it would be really easy to take the socket and cord out and re-use it. Then as I started taking the lamp apart I thought it was going to be really hard...then I did a little research and found out it really wasn't very hard at all!


I only needed the socket and cord for my lamp, but I ended up using that long metal tube as well.

First, I pulled apart the socket by squeezing really hard where it said "press".

Next you'll see that the cord is split, stripped and wrapped around two screws. Carefully loosen the screws and remove the wires. Now you'll be able to pull the cord out of the lamp.


I did not like the shiny brassy color of the socket and thought about spray painting it black but didn't know if that was a good idea. So I tried rubbing it off with nail polish remover. A few cotton balls later and I was left with this:


After running the cord back through the metal tube thing (I know there's a real name for it but I don't remember  it at the moment) I was ready to reattach the socket.

Feel your cord. One side will be smooth and the other will be ribbed. The smooth wire is the hot or live wire and the ribbed is the neutral wire. The live wire (smooth) wraps around the brass screw. Remember this and you'll be fine. When I had both wires connected and the socket reassembled I crossed my fingers and plugged it in...

and it worked!


Now, we'll talk about the tomato cage. It was already cool and chippy and rusty, but it had been purple at one point and I wasn't feeling that. So I used a trio of spray paint to give it a little facelift. All of these my mom already had so I didn't have to pay anything :)

I used a textured stone paint, a rusty metal primer (that is rust colored) and a flat black.


I didn't take pictures of this process, but I'll describe it. If anyone would like a more indepth tutorial I'd be happy to do one :)

First, lightly spray the stone spray paint all over, concentrating on the joints where rust is most likely to be. Then alternate spraying the primer and the black. You get to use your creative license because you don't want to solidly coat it with either color. 

I started with the primer, then hit spots with the black, went over some more spots with the primer and so on and so forth until I liked the finish.


Not too shabby, eh?


You could use this technique on so many things. I'm sure I'll be using it in the future.

I strung up the bulb and plugged it in...


I love it! I thought about shortening it, but I kind of like the dramatic impact it makes.


I'm swooning over the silver socket. To think that was hiding under that terrible brassy finish!


So, what do you think? Be honest! Love it? Hate it?

I was thinking about wrapping the cord in twine. What do you think? It's brown right now so it blends in. But twine would add some texture. I don't know! Opinions please!

Oh also...

Estimated cost: $0

How cool is that?!

Thanks for reading. Feel free to ask questions!

Sincerely,
Ashleigh

PS:
The DIY Show Off  Beyond The Picket Fence

My Uncommon Slice of Suburbia Photobucket
Transformation Thursday
The Lettered CottageDomestically SpeakingHOGChic on a Shoestring Decorating
Funky Junk's Saturday Nite Special

5.27.2011

DIY Project List

One of the cool things about starting this blog is that a few friends and kids from school have said that they were inspired to get a little creative and fix up their apartments. I am convinced that just because I'm in college doesn't mean I have to have a bunch of mismatched furnishings with no personality. I am more productive and feel more relaxed when I am in a space that is neat, clean and me. I'm also on a tight budget (like pretty much everyone else my age) so I'm trying to make my space my own for very little money.

So today I thought I'd round up a few projects that can be used to personalize your space on a budget.

Sincerely's Coffee Filter Light

The coffee filter light project was pretty popular among my friends. So here it is for those who missed it. Lighting in apartments is usually mediocre at best. This is an easy way to create a custom fixture.

Click here for original post.
Approximate cost: $30

Ruffle Shower Curtain

There is never much you can customize in a rented bathroom. One thing you do have control over is the shower curtain. Too bad cute shower curtains are expensive. Some of them upwards of $100! Check out this shower curtain from Anthro to see what I mean. Save yourself $113 dollars and make your own out of dollar store shower curtains with this tutorial by See Kate Sew.


Click here for original post.
 Approximate cost: $5

Industrial Side Tables

The college years = lots of moving. Lots of moving = not wanting a bunch of big furniture to move around. That's why these industrial side tables are such a good idea. They are cheap, sturdy and incredibly chic. BONUS: You can disassemble them for easy moving!

Click here for full tutorial.
 Approximate cost: $50
(Cheaper if you find scrap wood in your parents' garage or the wood shop!)


There are so many great ideas out there so I'll be posting more as I run across them. What do you think about these projects? Yay or nay?

Sincerely,
Ashleigh

5.10.2011

A Frenchy (?) End Table Makeover

This is the week. The last week, that is. If I'm alive on Wednesday, then all will be right with the world.

A few quick things:

1. I officially pulled my first thing off the curb. I'm a little embarrassed... but it's solid wood and has dovetailed drawers. I love it. I'll share it with you later this week!
2. I painted a couple different things with chalk board paint over the weekend and I'm waiting the 3 days until I can draw on them. It's driving me crazy! But I can't wait to show you :)
3. Just a couple days until we announce the winner of your first ever giveaway! Don't forget to enter-you have a great chance of winning!

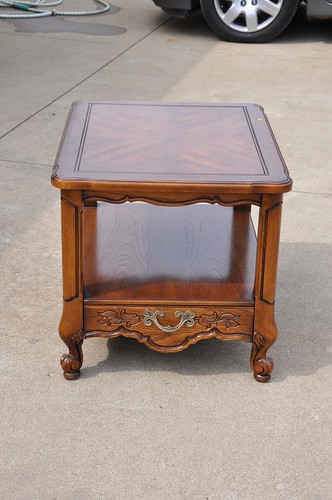
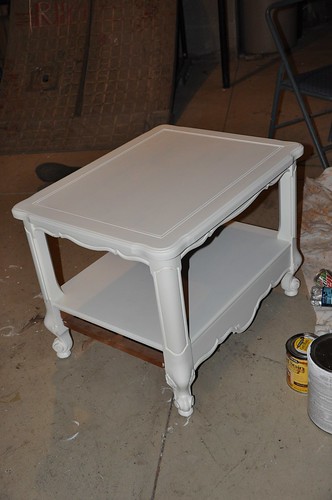
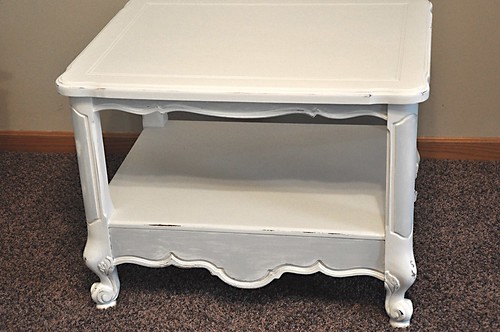
On to the makeover! I got this end table (thanks to my awesome boyfriend) at the same time as this one.

DSC_4668

I think my sister's exact words were, "I'm excited to see what you're going to do to this one because it's really ugly."

DSC_4669

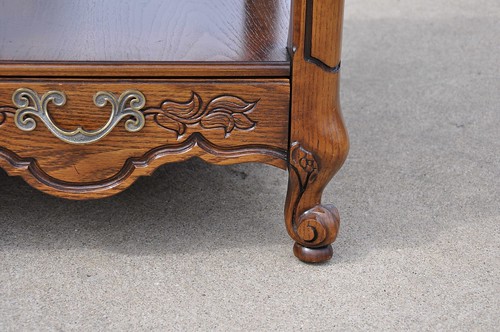
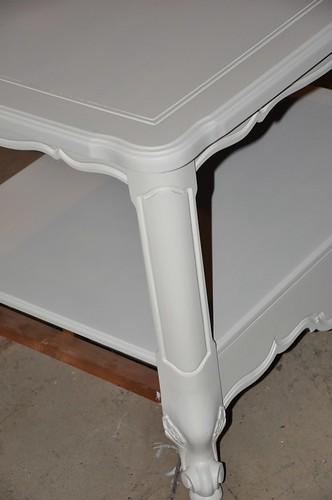
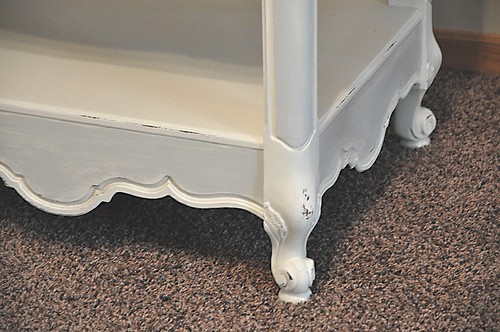
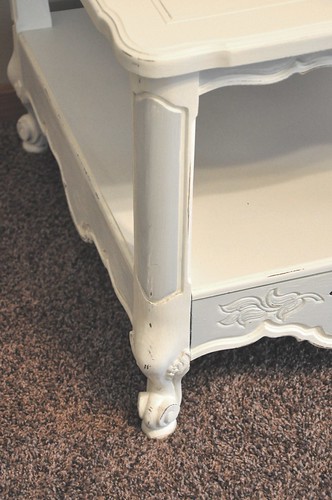
I loved her little feet and she was solid. And I'm always up for a challenge.

DSC_4850

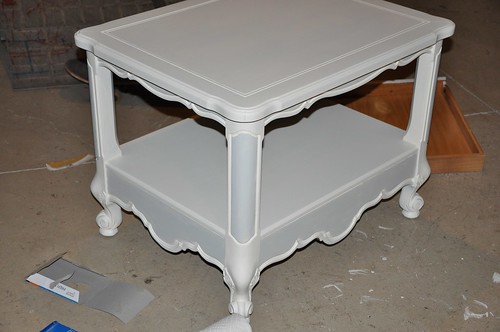
I primed her and gave her two coats of Martha Stewart's Heavy Cream. The top ended up needing an extra coat.
DSC_4851

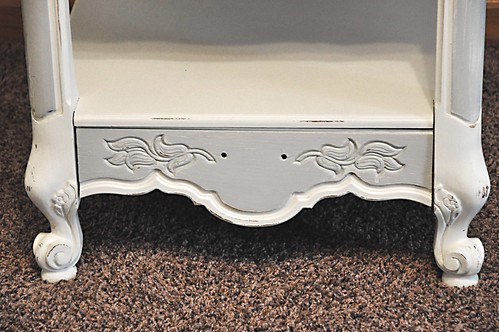
It seemed a little boring to me and I thought the detail of the piece would be perfect for a little two-tone action.

DSC_4852

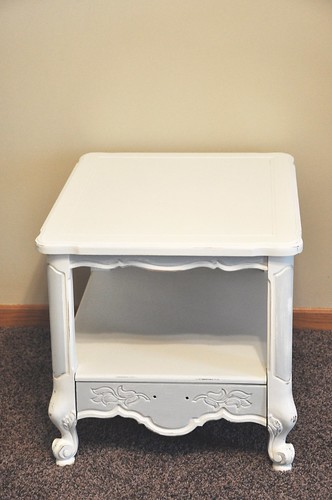
I mixed a little Winter's Day with the white to get a really light gray. I wanted it to be a subtle difference.

I distressed it lightly and she's still waiting to get a coat or two of protective wax.

Sorry for the drawer nudity. She's missing her drawer pull. It was out in the garage somewhere and I was in a hurry!

DSC_4843

DSC_4835

DSC_4836

DSC_4839

DSC_4844

DSC_4842

I love the way she turned out. I think Kait might even be impressed.


How do you feel about the two-tone look? Yay or nay?

Sincerely,
Ashleigh

PS:
HOGPhotobucketMy Uncommon Slice of Suburbia
a beach cottagemommahenscoopPhotobucketDomestically Speaking
Related Posts Plugin for WordPress, Blogger...